The Graph
Overview
The Graph is a powerful indexing protocol that simplifies how you access blockchain data. Using GraphQL, it enables seamless querying of smart-contract data through APIs called subgraphs.
In this tutorial, we'll create an indexer for a smart contract called DemoNFT, using the contract deployed in the Deploying an NFT with Hardhat tutorial. Don't worry if you haven't deployed it yourself, you can use this pre-deployed DemoNFT contract.
Why Learn The Graph?
The Graph makes blockchain data accessible and usable for developers, turning raw data into meaningful, queryable formats. Whether you're building a dApp or exploring blockchain analytics, mastering this tool is a game-changer.
Prerequisites
Before diving in, ensure you've got the following:
Example Code Repository
You can find the example code we used for this tutorial here.
Step 1: Creating a Subgraph Project
- Kickstart Your Subgraph
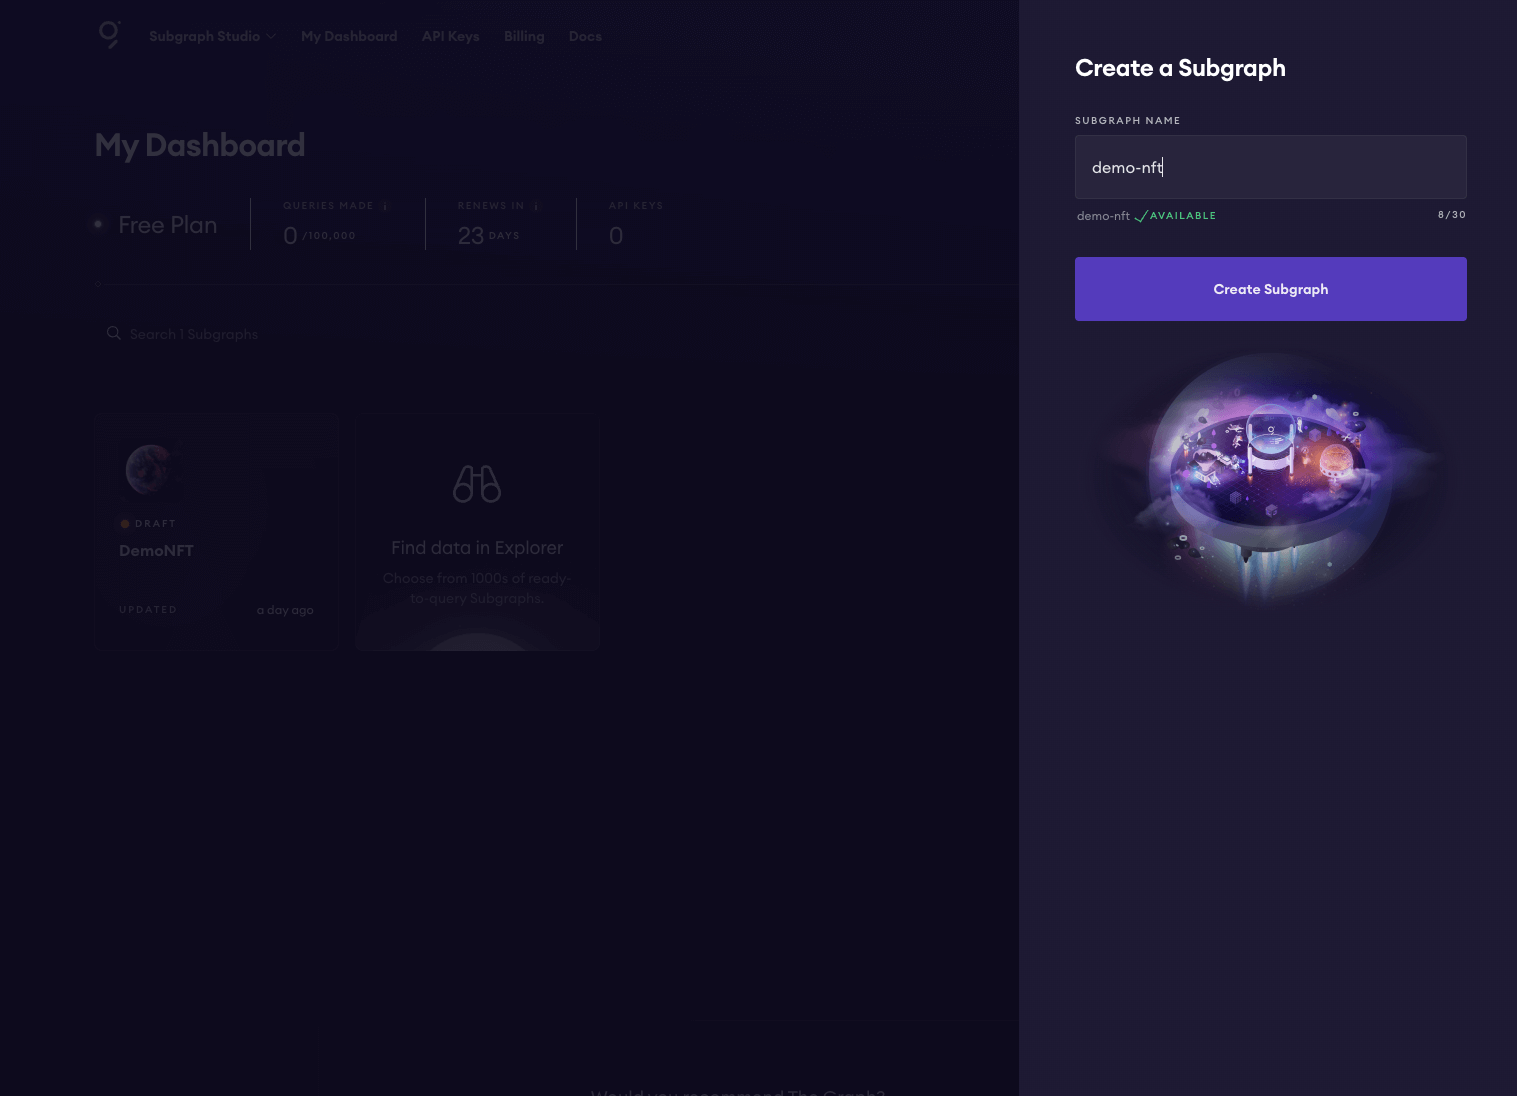
- Visit Subgraph Studio and connect your wallet.
- Click "Create a Subgraph" and choose a descriptive name (it's permanent).
-
Set Up Your Environment
- Install The Graph CLI:
npm install -g @graphprotocol/graph-cli@latest - Initialize your subgraph using the slug displayed in Subgraph Studio:
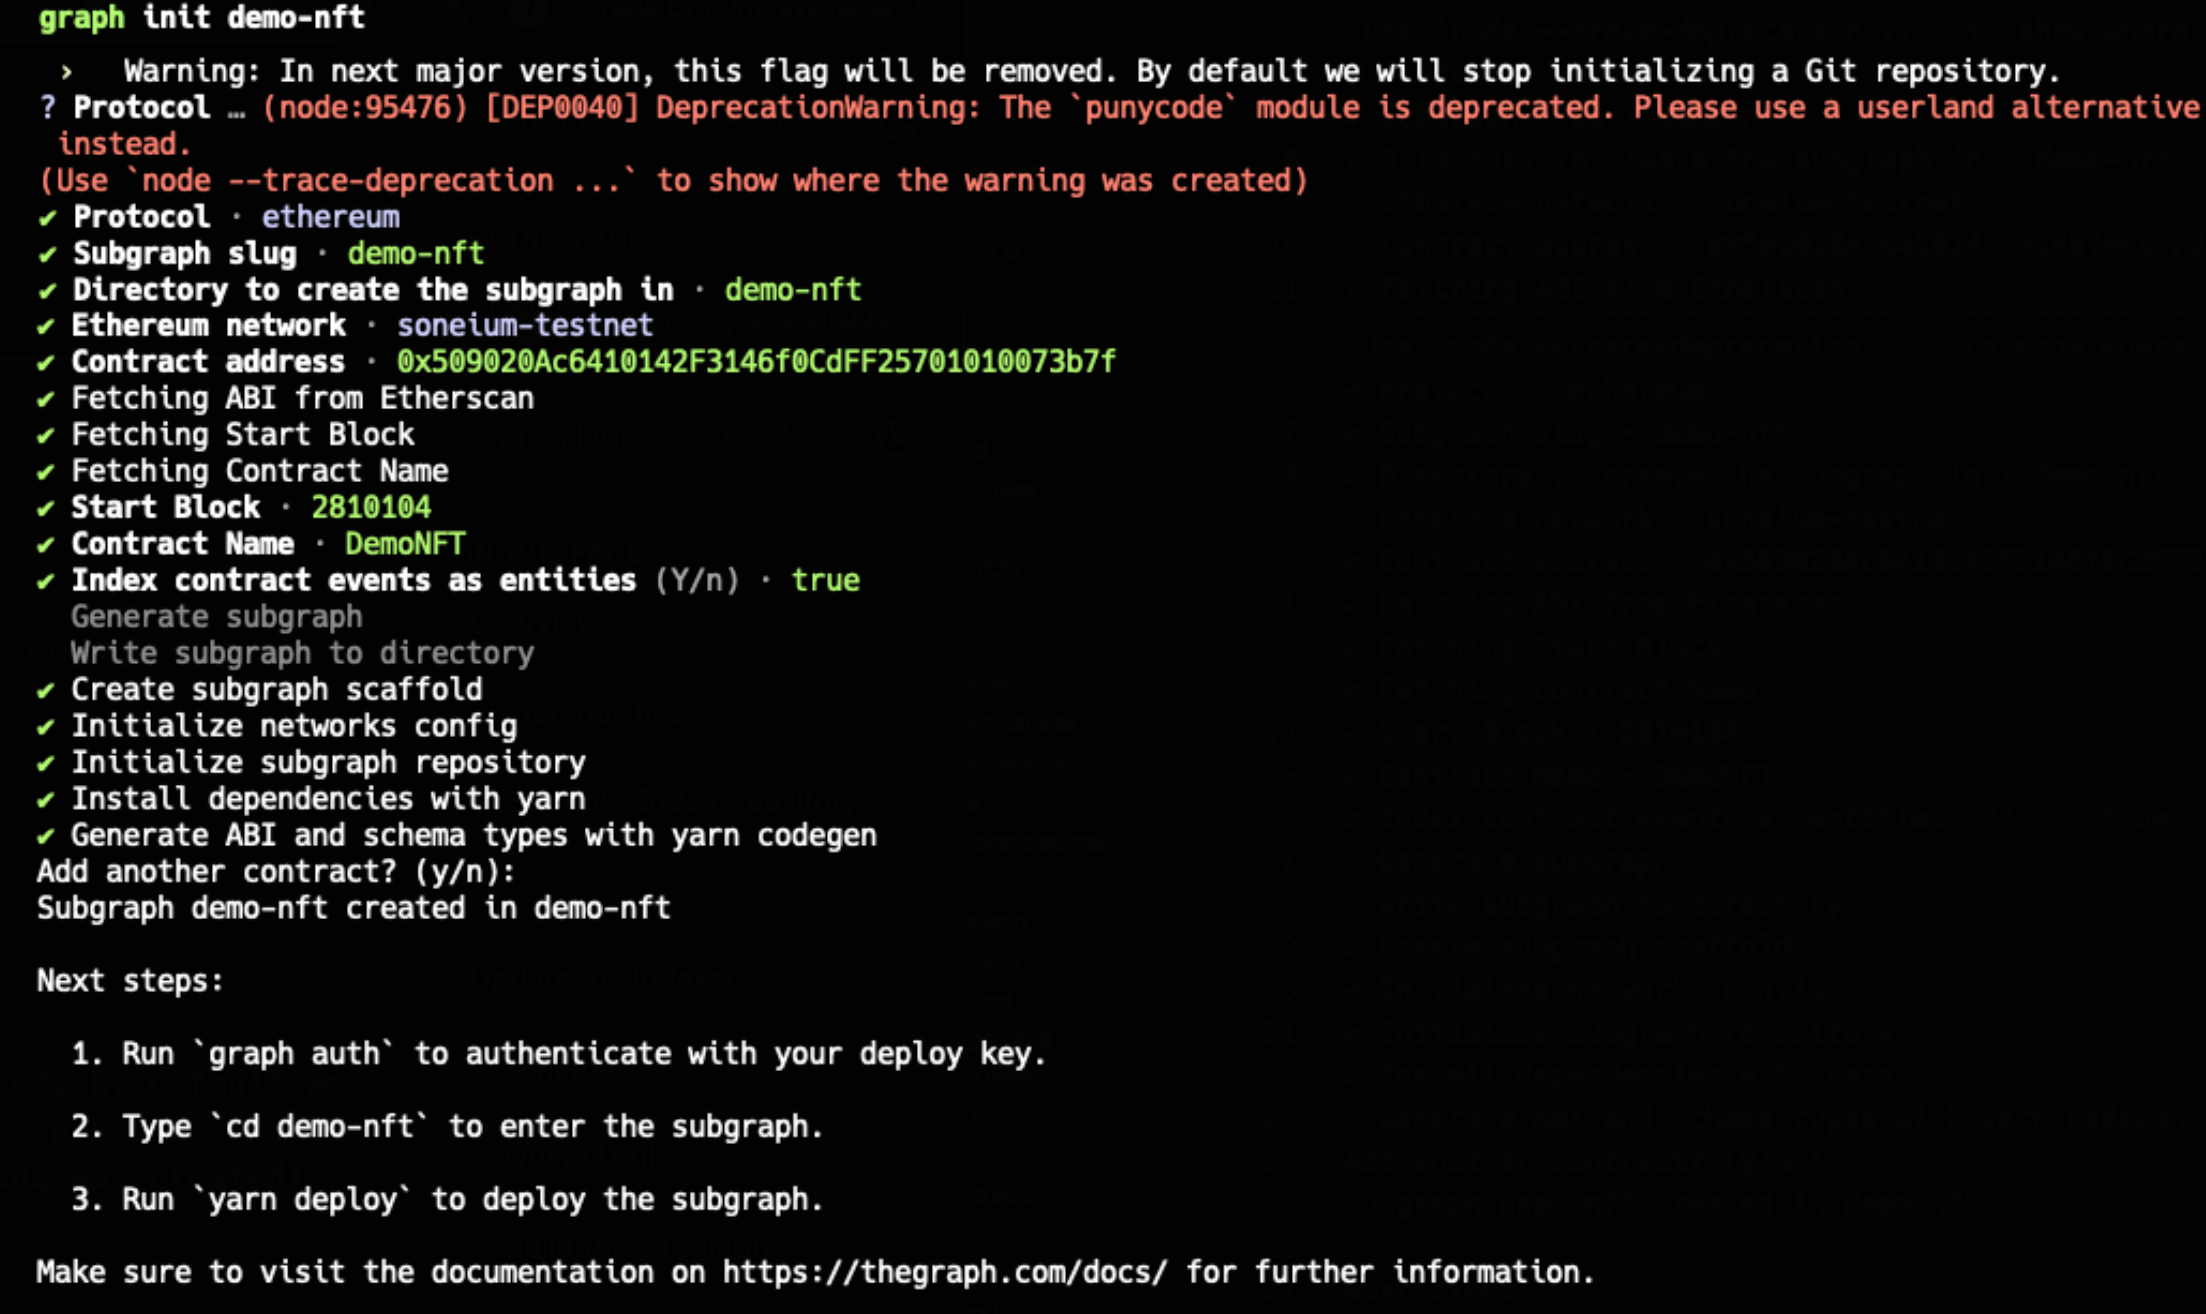
graph init <SUBGRAPH_SLUG>
cd [subgraph_name]
The CLI will guide you through setting up the project. It can even fetch your contract's ABI automatically! If you haven't deployed your own DemoNFT contract, enter the address of the pre-deployed contract instead.
- Install The Graph CLI:
Step 2: Building the Indexer
Our goal: Create a schema called DemoNFT to track NFT ownership via the Transfer event.
Designing the Schema
Replace the contents of the schema.graphql file in the root directory of your subgraph project with the following:
type DemoNFT @entity {
  id: String! # tokenId of the NFT
  owner: Bytes! # Owner's wallet address
}
Writing the Query Logic
We are going to index the Transfer event for this DemoNFT query as _transfer, _mint, and _burn functions will emit the Transfer event. Let's update demo-nft.ts in src folder.
import { Transfer as TransferEvent } from "../generated/DemoNFT/DemoNFT";
import { DemoNFT } from "../generated/schema";

export function handleTransferEvent(event: TransferEvent): void {
  // find from DemoNFT entity if it exists
  let entity = DemoNFT.load(event.params.tokenId.toString());

  if (entity) {
    // update the owner field
    entity.owner = event.params.to;

    // save the entity
    entity.save();

    return;
  }

  // create a new entity
  entity = new DemoNFT(event.params.tokenId.toString());

  // set the owner field
  entity.owner = event.params.to;

  // save the entity
  entity.save();
}
Update the subgraph.yaml
Update the eventHandlers with the following content.
specVersion: 1.0.0
indexerHints:
  prune: auto
schema:
  file: ./schema.graphql
dataSources:
  - kind: ethereum
    name: DemoNFT
    network: soneium-testnet
    source:
      address: "0x509020Ac6410142F3146f0CdFF25701010073b7f"
      abi: DemoNFT
      startBlock: 2810104
    mapping:
      kind: ethereum/events
      apiVersion: 0.0.7
      language: wasm/assemblyscript
      entities:
        - Approval
        - ApprovalForAll
        - OwnershipTransferred
        - Transfer
      abis:
        - name: DemoNFT
          file: ./abis/DemoNFT.json
      eventHandlers:
        - event: Transfer(indexed address,indexed address,indexed uint256)
          handler: handleTransferEvent
      file: ./src/demo-nft.ts
Step 3: Build and Test Your Subgraph
Build the Subgraph
Before testing, you need to build the subgraph to ensure everything is correctly set up. Run the following commands:
$ graph codegen
$ graph build
Run graph codegen whenever you update the schema and graph build when the mapping logic changes.
Writing Tests
- Update the
tests/demo-nft-utils.tsfile by addingcreateTransferEventfunction. - Update the
tests/demo-nft.test.tsfile
- demo-nft-utils.ts
- demo-nft.test.ts
import { Address, ethereum, BigInt } from "@graphprotocol/graph-ts";
import { newMockEvent } from "matchstick-as";
import { Transfer } from "../generated/DemoNFT/DemoNFT";

export function createTransferEvent(
  from: Address,
  to: Address,
  tokenId: BigInt
): Transfer {
  const transferEvent = changetype<Transfer>(newMockEvent());

  transferEvent.parameters = new Array();

  transferEvent.parameters.push(
    new ethereum.EventParam("from", ethereum.Value.fromAddress(from))
  );
  transferEvent.parameters.push(
    new ethereum.EventParam("to", ethereum.Value.fromAddress(to))
  );
  transferEvent.parameters.push(
    new ethereum.EventParam(
      "tokenId",
      ethereum.Value.fromUnsignedBigInt(tokenId)
    )
  );

  return transferEvent;
}
import { Address, BigInt } from "@graphprotocol/graph-ts";
import {
  afterAll,
  assert,
  beforeAll,
  clearStore,
  describe,
  test,
} from "matchstick-as/assembly/index";
import { handleTransferEvent } from "../src/demo-nft";
import { createTransferEvent } from "./demo-nft-utils";

describe("Describe entity assertions", () => {
  beforeAll(() => {
    const from = Address.fromString(
      "0x0000000000000000000000000000000000000001"
    );
    const to = Address.fromString("0x0000000000000000000000000000000000000002");
    const tokenId = new BigInt(0);
    const newTransferEvent = createTransferEvent(from, to, tokenId);
    handleTransferEvent(newTransferEvent);
  });

  afterAll(() => {
    clearStore();
  });

  test("DemoNFT entity created and owner field set", () => {
    // Check that exactly 1 DemoNFT entity exists
    assert.entityCount("DemoNFT", 1);

    // Check the id field (tokenId as string)
    assert.fieldEquals("DemoNFT", "0", "id", "0");

    // Check that the DemoNFT entity has the correct id and owner address
    assert.fieldEquals(
      "DemoNFT",
      "0", // tokenId as string, which is the id of the entity
      "owner",
      "0x0000000000000000000000000000000000000002"
    );
  });
});
Running Tests
Run the tests with:
$ yarn test
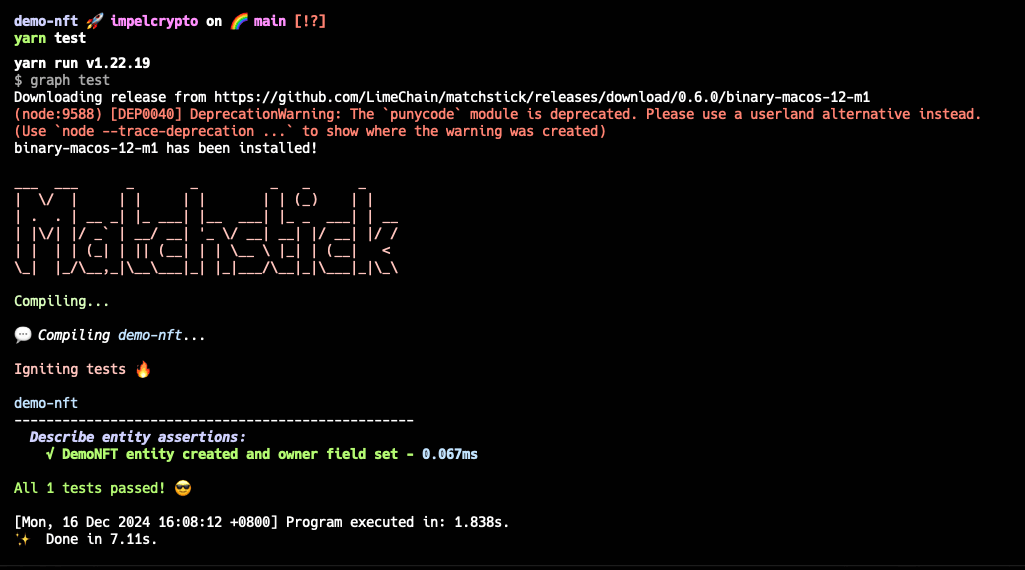
There is a unknown bug in the matchstick that the CLI won't display the test result on your terminal. In that case, you can add a GitHub action in your repo and see the result in the PR.
GitHub action source codeStep 4: Deploying the Subgraph
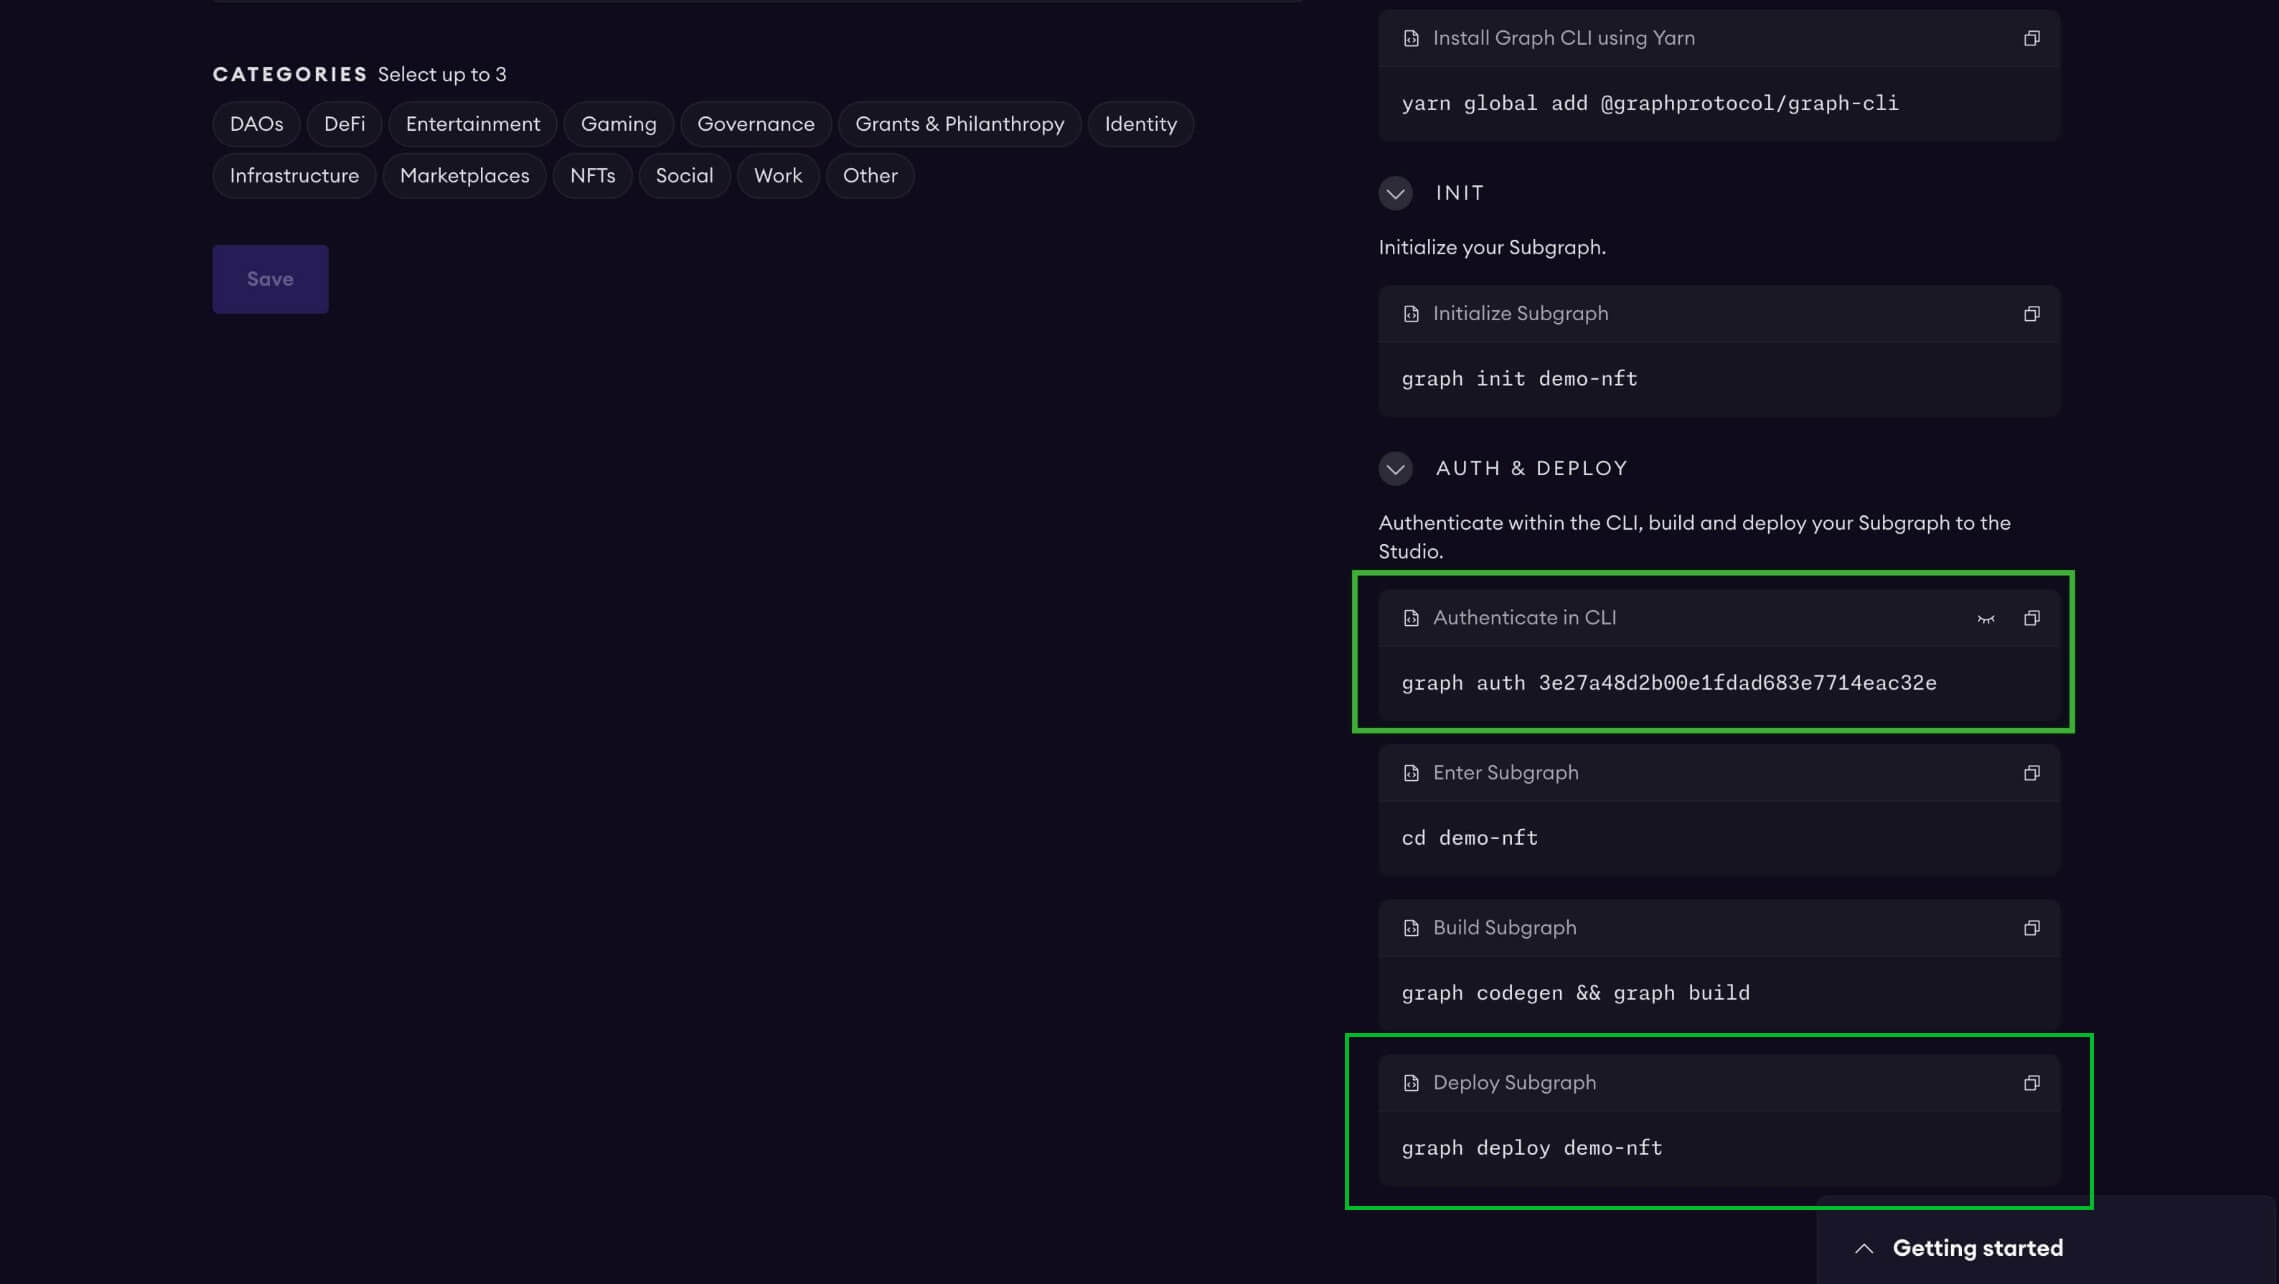
Authenticate and deploy your subgraph using these commands. You can copy these commands directly from your subgraph's page in Studio to include your specific deploy key and subgraph slug. graph auth is required for the first time only.
$ graph auth <DEPLOY_KEY>
$ graph deploy <SUBGRAPH_SLUG>
Step 5: Querying the Data
Test with Playground
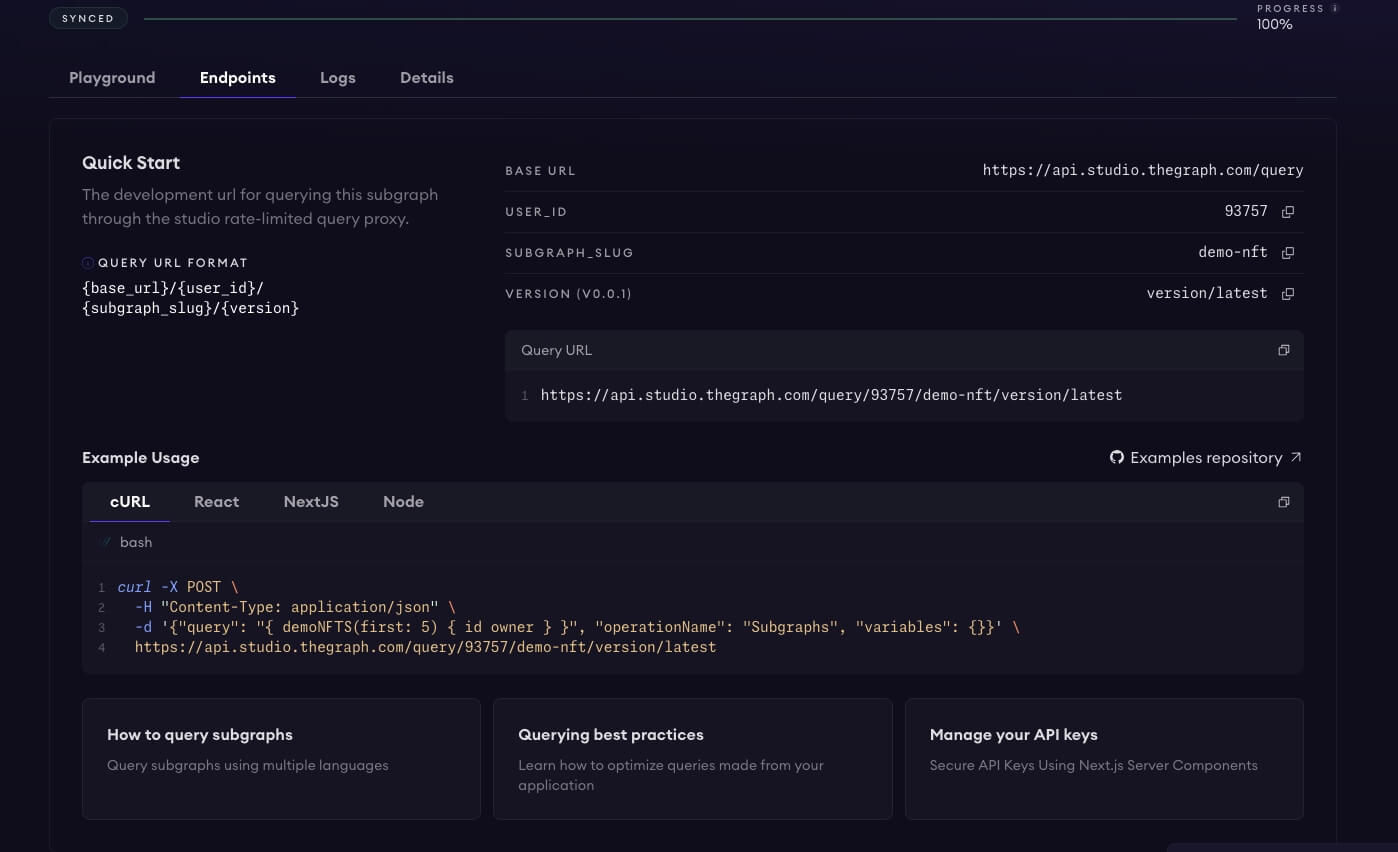
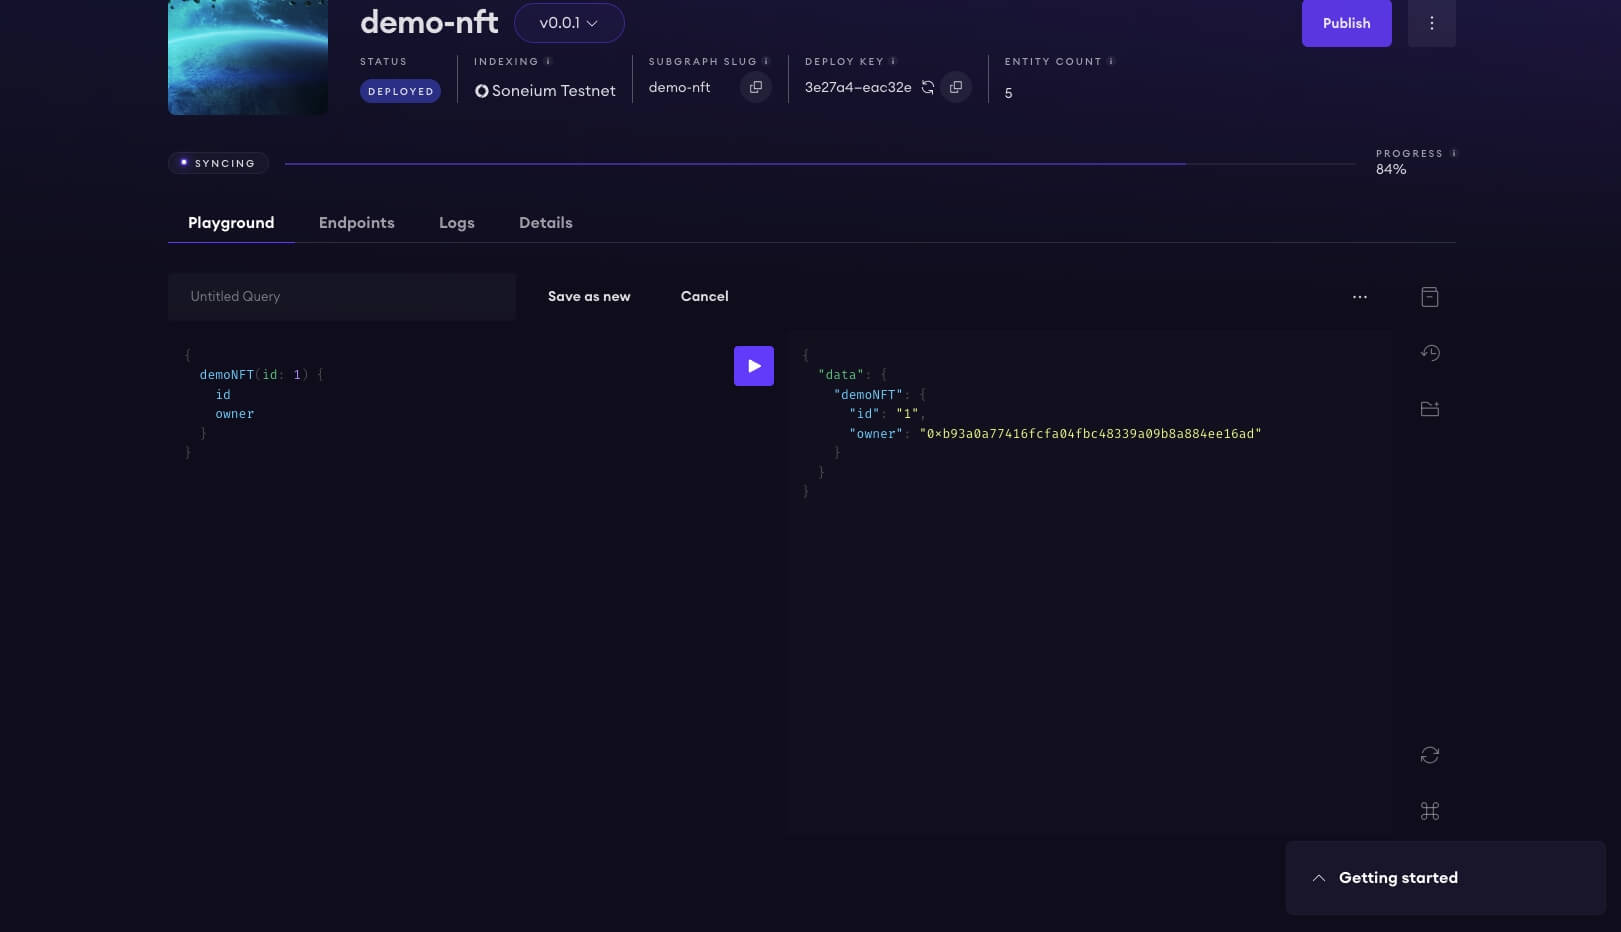
You can test your subgraph by making a sample query in the playground section. The Details tab will show you an API endpoint. You can use that endpoint to test from your dapp.
{
  demoNFT(id: 1) {
    id
    owner
  }
}
Query by API
Leverage the development API endpoint to integrate data queries into your application.
For example:
curl -X POST \
  -H "Content-Type: application/json" \
  -d '{"query": "{ demoNFT(id: 5) { id owner } }", "operationName": "Subgraphs", "variables": {}}' \
  https://api.studio.thegraph.com/query/93757/demo-nft/version/latest

> {"data":{"demoNFT":{"id":"5","owner":"0xb0b24d750ad75d581654f54b6b0eca5d553fee41"}}}
